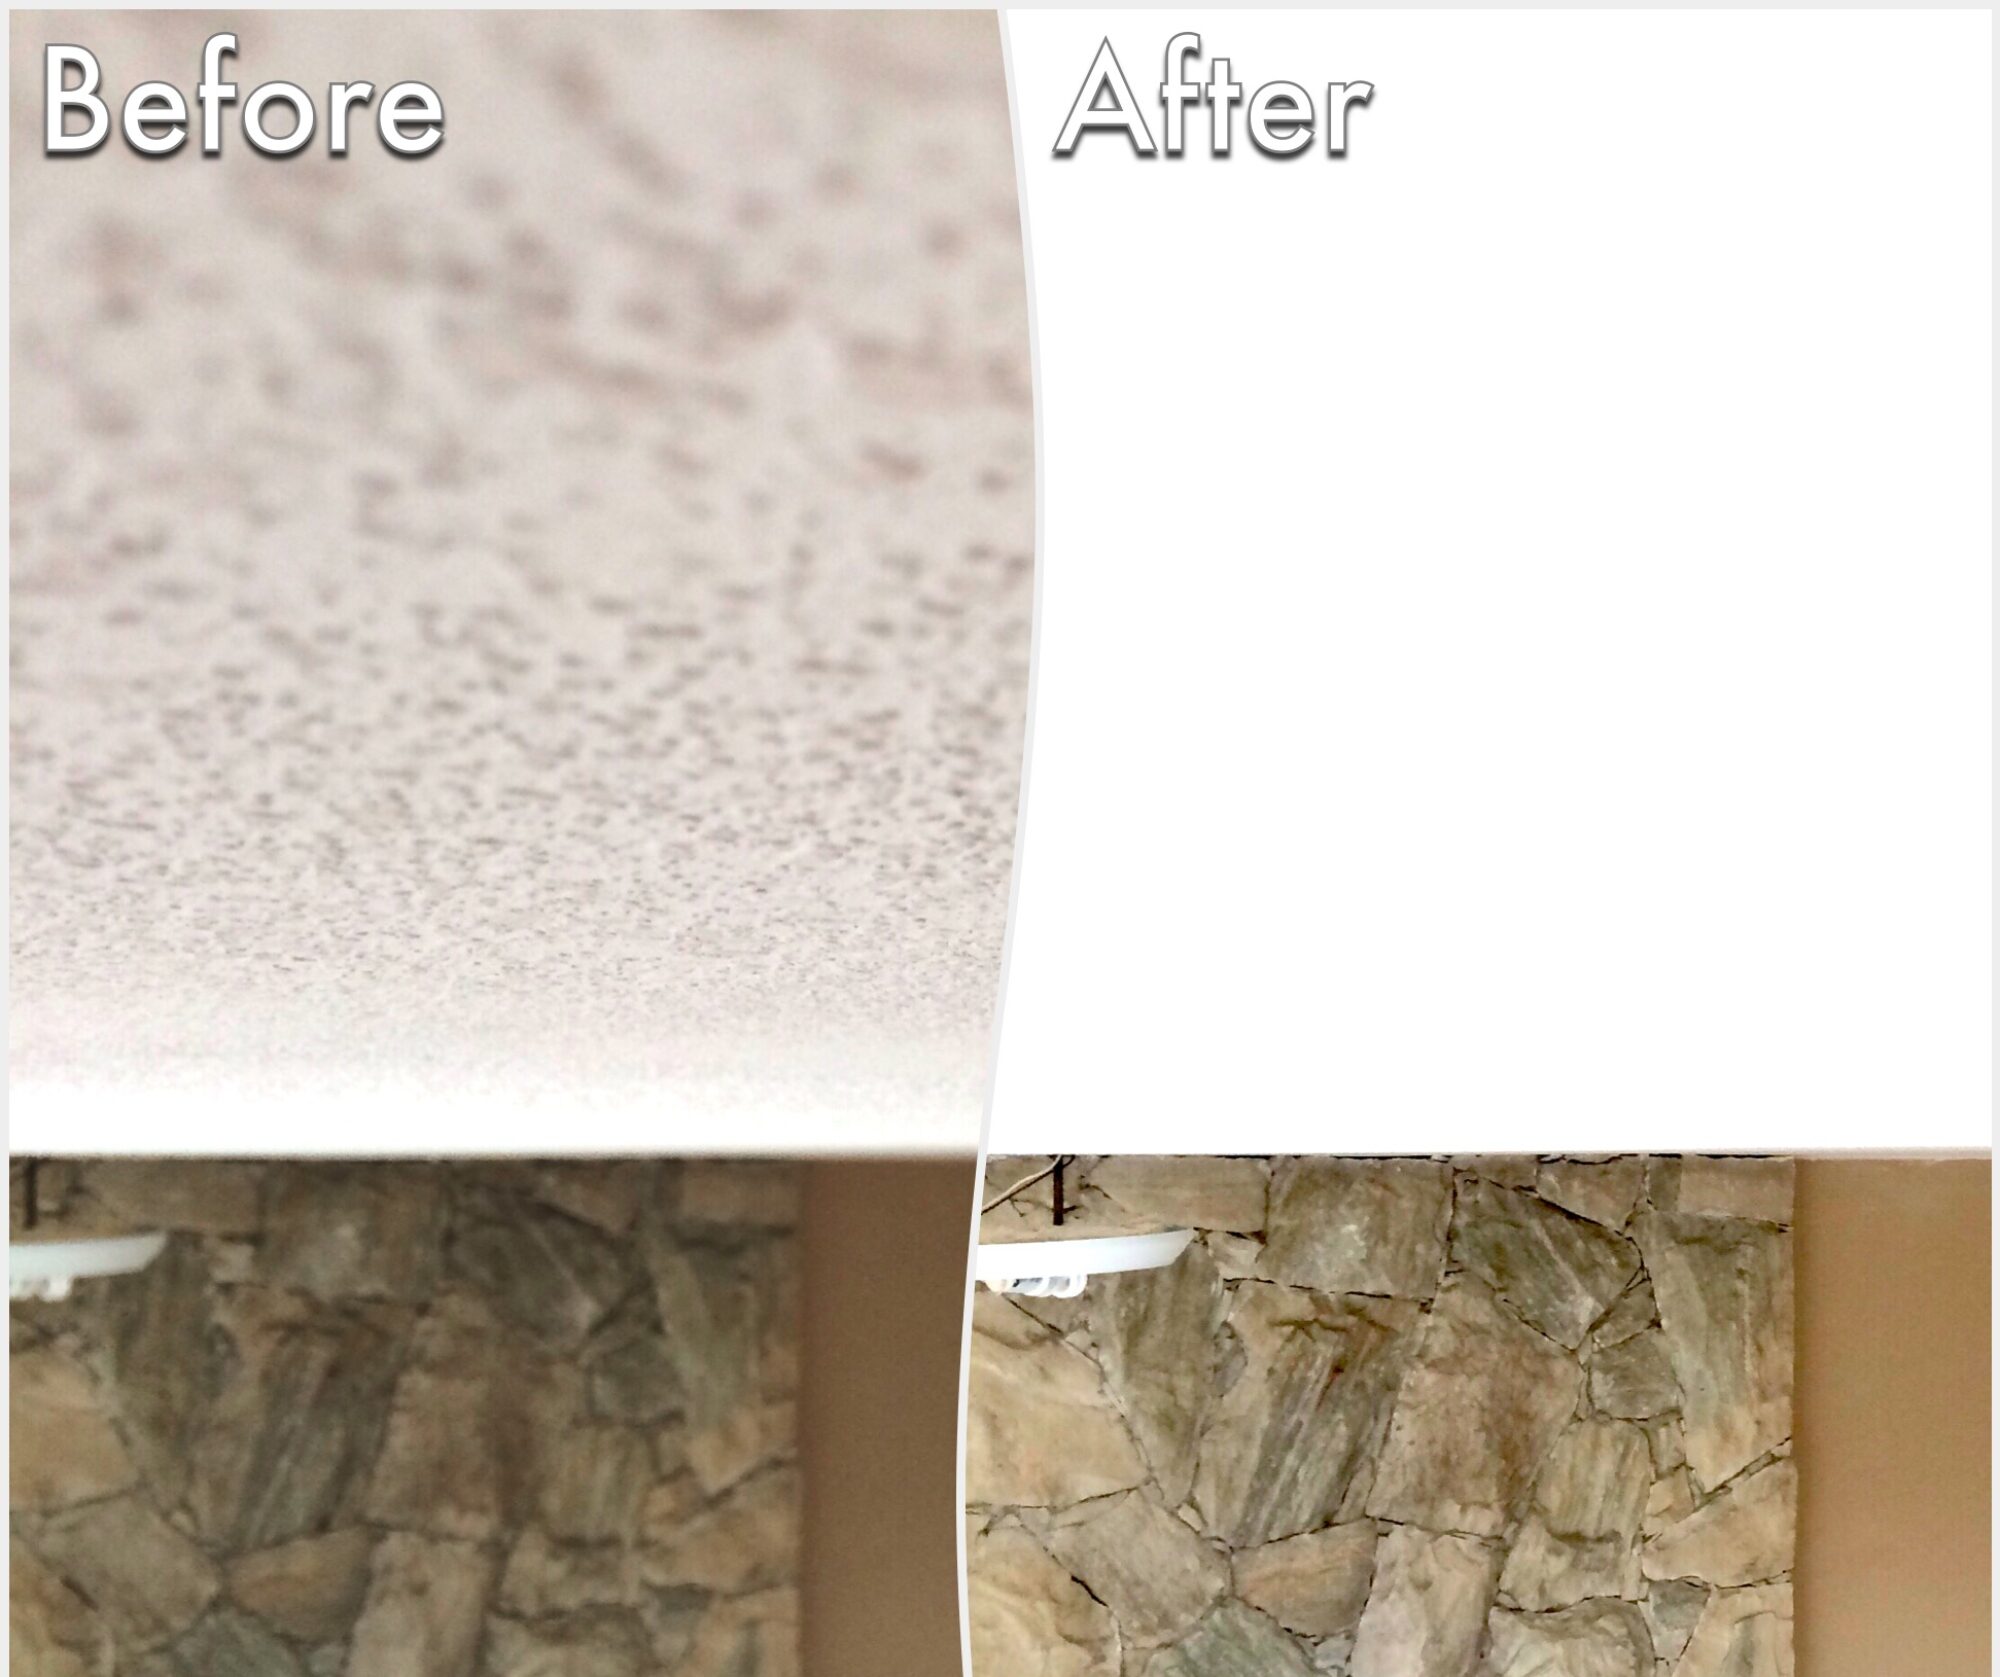
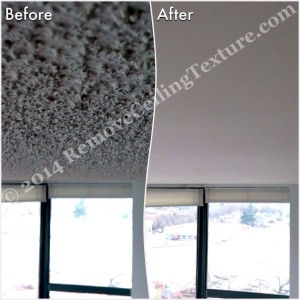
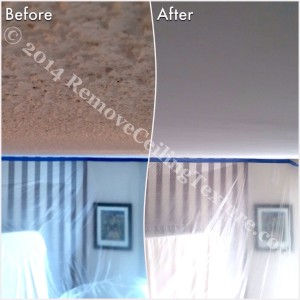
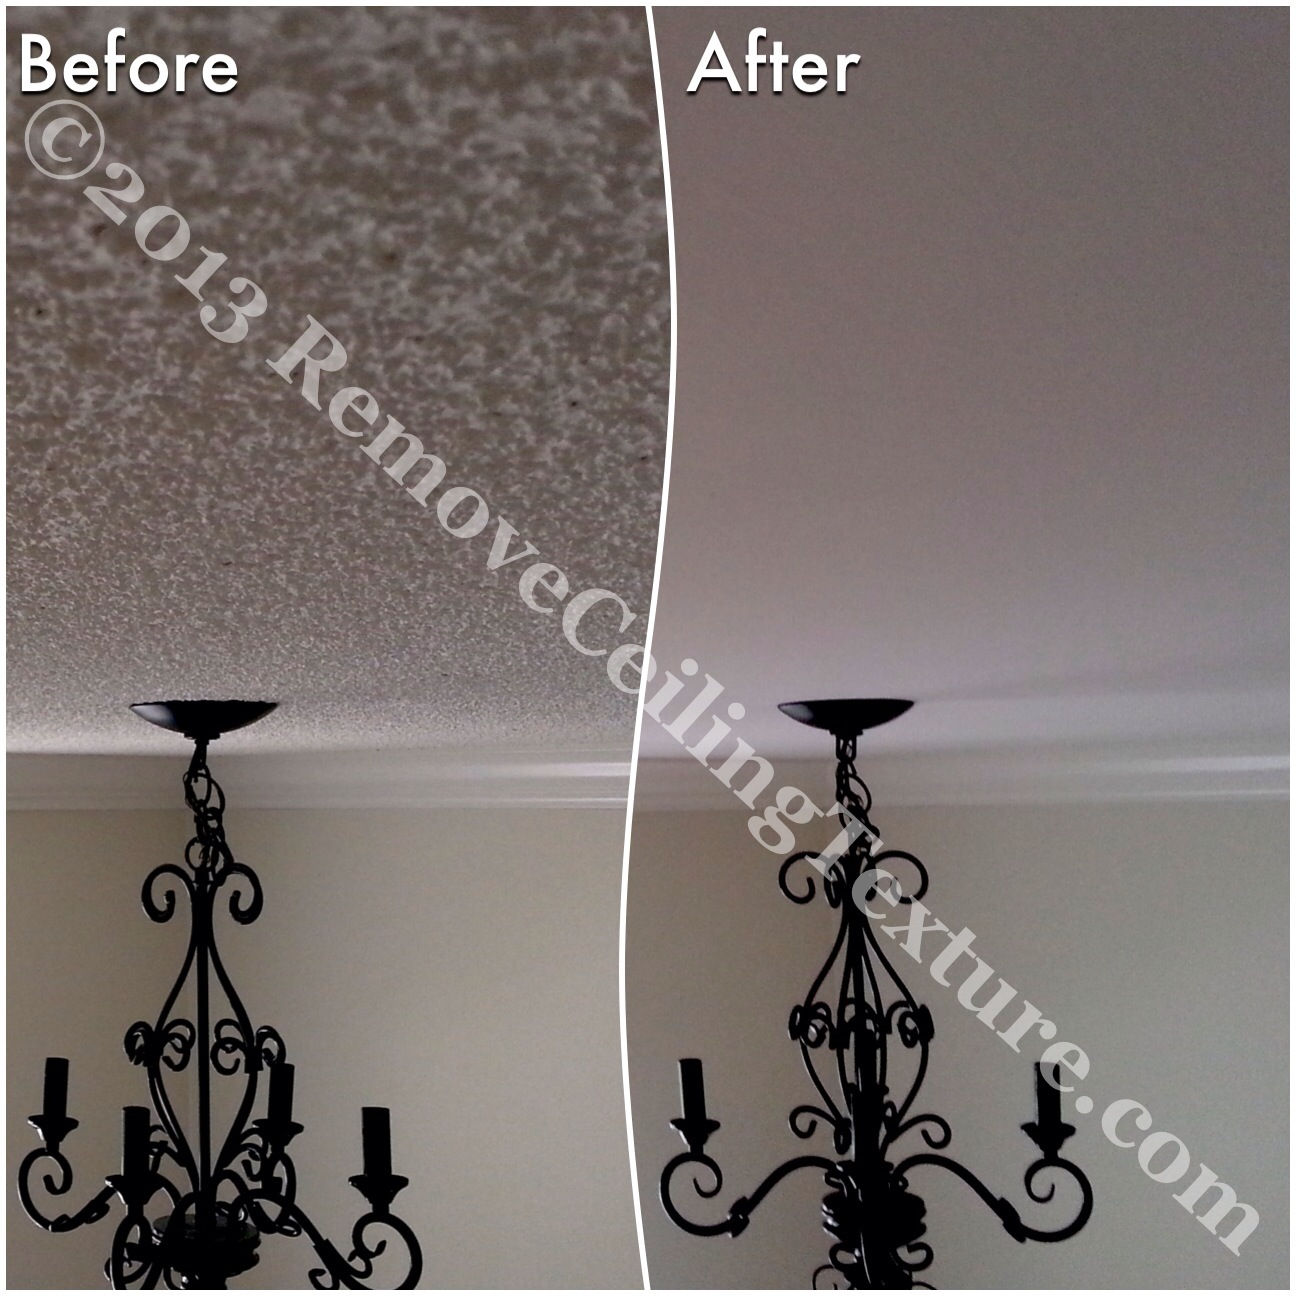
Ceiling texture removed by professional ceiling contractors at a Vancouver condo – Bedroom at 1331 Homer St.
The Importance of Hiring Professional Ceiling Contractors
Professional ceiling contractors can make all the difference when it comes to having your ceiling texture removed. An inexperienced contractor who is not familiar with ceiling texture can cause delays in your project, and the end results can be less than ideal.
We were contacted by new homeowners on Homer Street in Vancouver. They had just purchased their first condo and while they were excited about this, they were not thrilled with the textured ceilings. One of the first things they planned for, before moving in, was ceiling texture removal. Unfortunately for them, they hired someone with very little experience with ceilings.
They were promised a three-day job by their contractor. By the end of the first day, the frustrated contractor had completed only one small room and told them there was no way he could finish the job for them. Needless to say, the homeowners were pretty frustrated too. When dealing with ceilings, especially concrete ceilings, it’s important to hire professional ceiling contractors. Some drywall contractors and general handymen may think that removing popcorn ceilings is no big deal, but they often find they are in over their heads, as was the case in this instance.
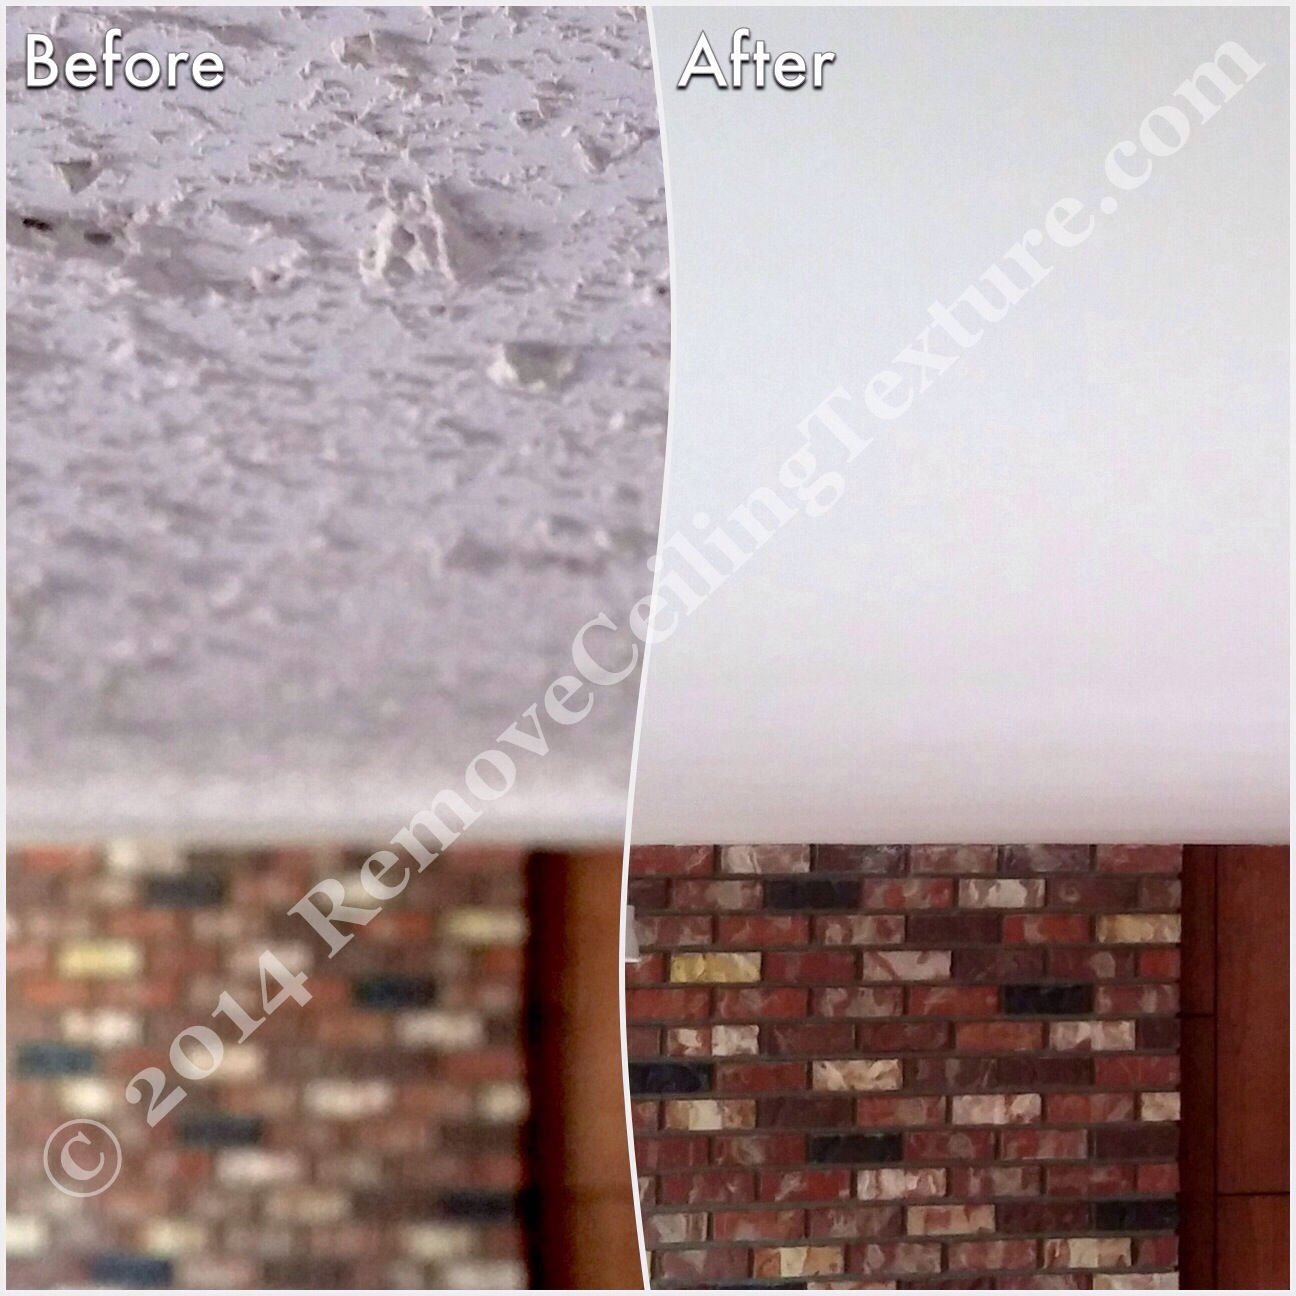
RemoveCeilingTexture.com was then contacted. The homeowners were a bit panicked by this time because they were anxious to move in. We had a look at the ceilings and assured them it would be no problem for us, as we’ve done many concrete ceilings. In fact, we had done a condo in the very same building. They were happy with this news and agreed for us to start the following week. We soon had the texture removed in their condo and resurfaced the ceilings to a flat, smooth surface.
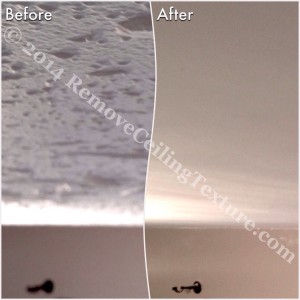
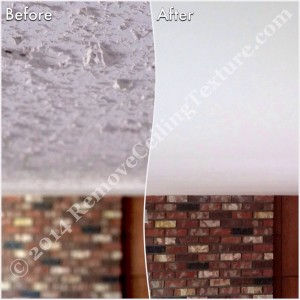
Here are some before and after photos from this project:
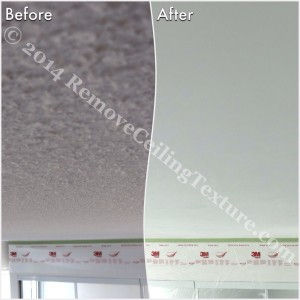
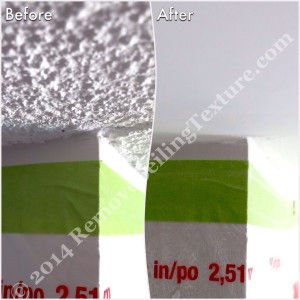
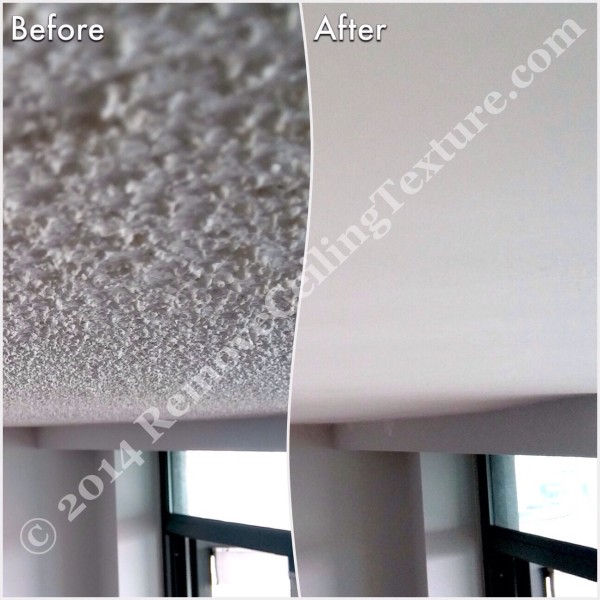
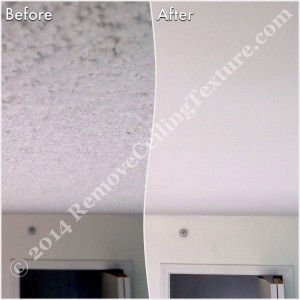
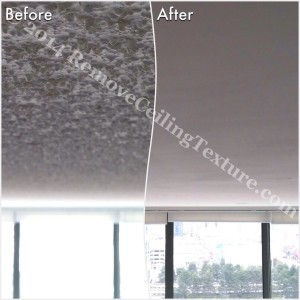
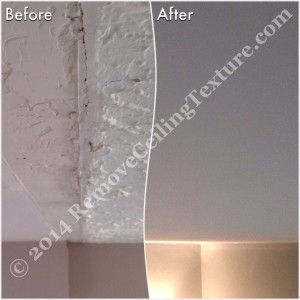
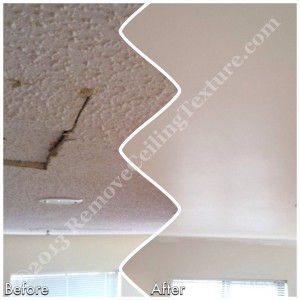
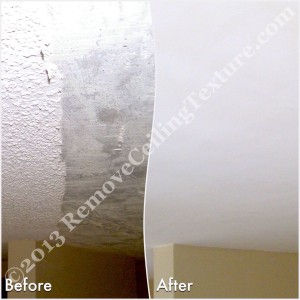
Close-up view of corner after ceiling texture removal at a condo at 1331 Homer St., VancouverSmooth ceilings appear higher – Vancouver condo at 1331 Homer St.
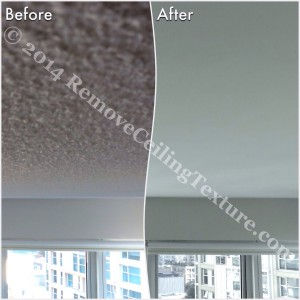
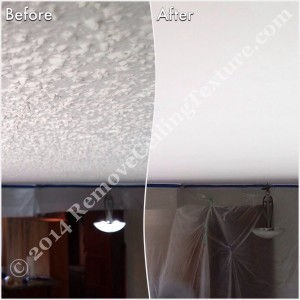
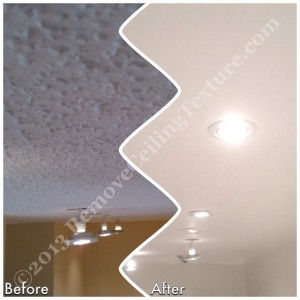
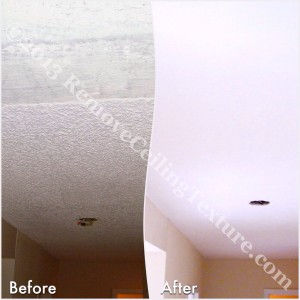
Once professional ceiling contractors were called in, the texture removal went smoothly: Living room with smooth ceilings – condo at 1331 Homer St, Vancouver
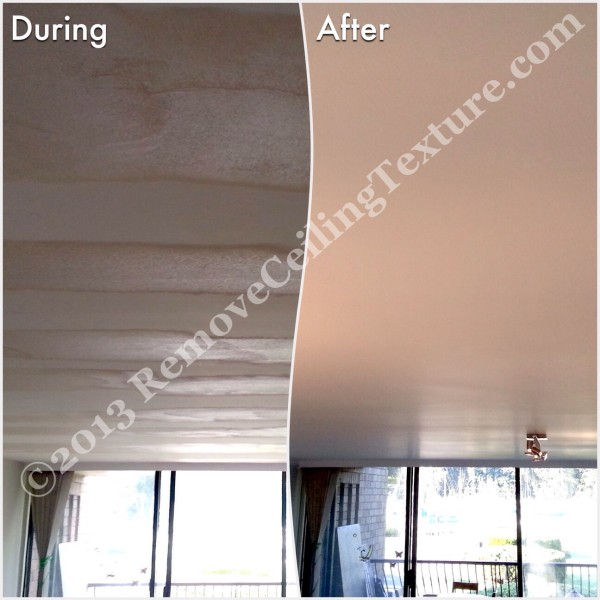
Riding the Waves
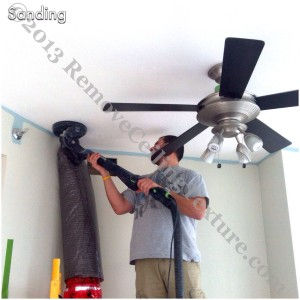
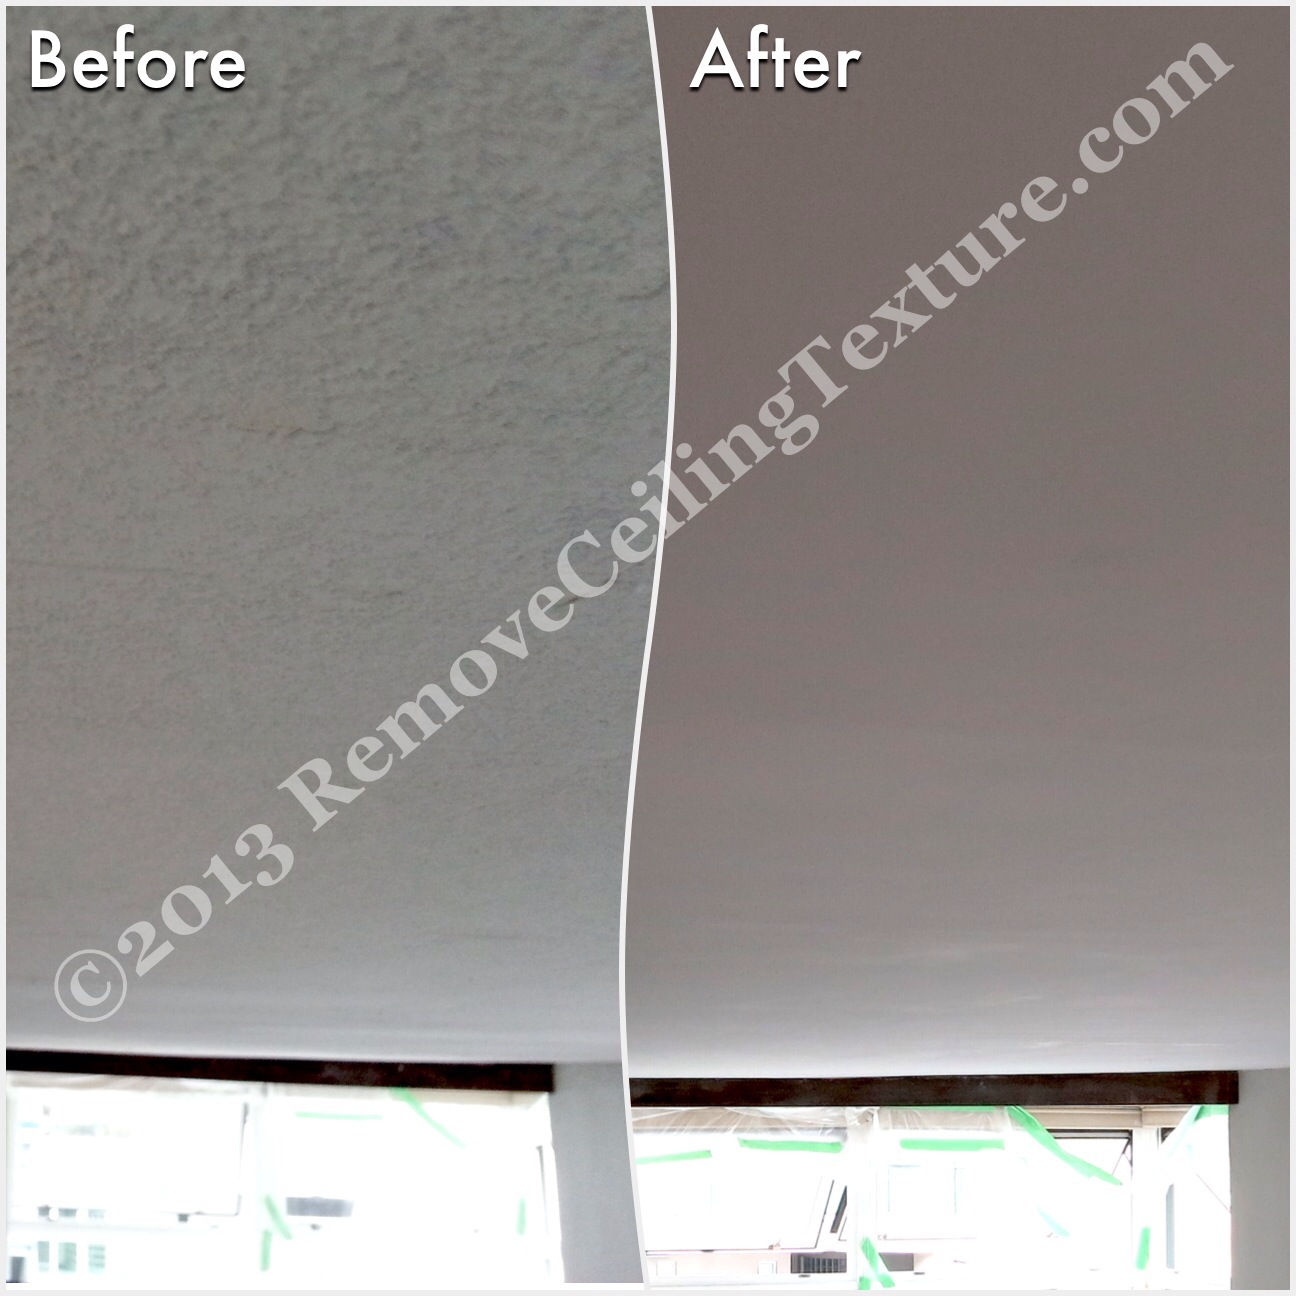
It’s especially important to hire professional ceiling contractors when dealing with the concrete ceilings of highrise buildings. The ceilings are sometimes wavy due to inconsistencies in the forms used when they pour the concrete. At RemoveCeilingTexture.com, we resurface the ceilings by hand and can adjust for these waves.
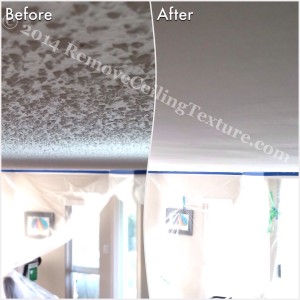
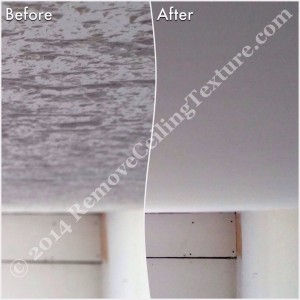
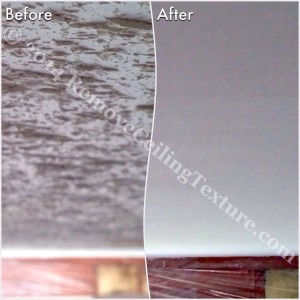
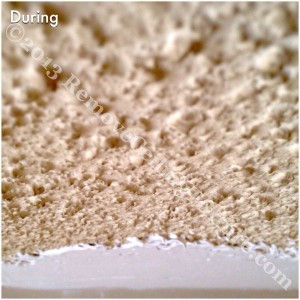
This “During and After” photo shows a ceiling that had the texture removed by someone inexperienced. We were later called in to fix the dips that were apparent. If we had been contacted from the start, the homeowner would not have had to pay twice for flat ceilings.
Once RCT filled in the waves, resurfaced the ceiling and painted it, it was perfect.
If you have popcorn ceilings that you’d like to have removed, contact the professionals at RemoveCeilingTexture.com. As experts in the ceiling industry, we get the job done right the first time. Call us at 604-420-7578 or contact us by email.
Contact the ceiling professionals at RemoveCeilingTexture.com today for a FREE quote on ceiling texture removal!
Popcorn ceiling removal at a condo at 1128 Quebec St, Vancouver – Dining Room
Saturday – Begin Project
1. Arm yourself with a scraper and determination.
2. Haul out your old, rickety ladder. Hmmm, you’ve been meaning to get a new ladder…
3. Go buy a new ladder. And several other things that catch your eye at Costco.
4. Set up the new ladder in the bedroom. Remove the popcorn. Easy.
5. Realize the layers of paint on the ceiling do not make for easy scraping. Use some elbow grease.
6. Curse at the hole you’ve gouged in the drywall by using elbow grease.
7. Look at the small patch you’ve managed to scrape off so far. Look at the rest of the room ahead of you and think of the other bedrooms, dining room, living room and hallway still waiting. Sigh.
Popcorn ceiling removal at a condo at 1128 Quebec St, Vancouver – Bedroom
8. Climb down the ladder and shake off all the popcorn and dust from your hair and clothes. Wonder if the dust is hazardous.
9. Sit down at computer and Google “is popcorn ceiling dust dangerous”. Hide screen from your wife as you see the word ASBESTOS.
10. Find out that your house is not old enough to have asbestos. Phew.
11. Check email, Facebook & Twitter. Find out if the ladder you bought is cheaper anywhere else.
12. Eat lunch.
13. March back to the bedroom. Try to ignore Rover’s sad puppy dog eyes and the leash in his mouth. Fail. Call for your wife to take Rover for a walk. Remember she has taken your daughter to a piano lesson.
14. Be pulled along by Rover as he sniffs every bush and pees on every post. Realize, too late, that you forgot to bring a plastic bag. S#*t.
Popcorn ceiling removal at a condo at 1128 Quebec St, Vancouver – Hallway
15. Revived from the fresh air, continue your work in the bedroom. Climb up and down the ladder multiple times as you move it foot by foot around the 200 square foot room.
16. Greet your wife and daughter as they walk in the door. Wonder why their mouths are dropped open in horror. Look down from your perch on the ladder at the popcorn-strewn floor around you. Comfort them with the fact that at least it doesn’t have asbestos.
17. Vacuum the popcorn-ceiling-dust trail that Rover has tracked all over the house.
18. Eat dinner. Resolve that you will continue working after dinner.
19. Decide to catch a bit of the game before continuing.
20. Decide it’s too late to continue with the ceiling tonight. Continue to watch TV instead.
21. Calmly answer your wife’s questions about the scrape marks and gouges in the bedroom ceiling.
Sunday – Continue Project
22. Mow the lawn.
23. Start removing popcorn ceiling in hallway.
24. Remember you have to renew your car insurance before it runs out tomorrow. Go renew insurance.
25. Start removing popcorn ceiling in hallway, until your wife suggests maybe the living room should be next.
26. Start removing popcorn ceiling in the living room.
27. Realize that starting this project may have been a mistake.
Popcorn ceiling removal at a condo at 1128 Quebec St, Vancouver – Living RoomPopcorn ceiling removal at a condo at 1128 Quebec St, Vancouver – Living Room
28. Have an early lunch because you have to go coach your daughter’s soccer team.
29. Notice that your garage s pretty messy and spend several hours sorting through junk.
30. Have dinner.
31. Continue working on the living room ceiling until Game of Thrones comes on.
Monday – Friday: You’re too tired after work to contemplate working on the ceilings.
Saturday – Sunday: This weekend is your daughter’s soccer tournament.
Monday – Friday: You’re too tired after work to contemplate working on the ceilings.
Is Your Time Worth Nothing?
Popcorn ceiling removal at a condo at 71 Jameson Crt, New Westminster – Living room
The above timeline may be a bit of an exaggeration, but the point is, you have other responsibilities in your life besides removing popcorn ceilings. When you’re working on your own home, there are dozens of things to distract you. You may think, “But I’ll save money doing it myself!” That’s only true if you value your own time at zero, because as the saying goes, time is money. Also, no matter what the online guides say about how to remove popcorn ceilings, it’s not easy work. It doesn’t always scrape off easily, and you could damage the drywall beneath. Another thing these guides don’t usually mention is that scraping the texture off is only the first step to getting smooth ceilings. Your ceilings will still need to be resurfaced before you can think about painting them, or they will look rough. It’s usually fairly easy to spot a DIY texture removal–they just don’t look quite finished.
Popcorn ceiling removal at a condo at 71 Jameson Crt, New Westminster – Dining Room
At RemoveCeilingTexture.com we cringe when we see the How to Remove Popcorn Ceilings guides online because we know that as with many DIY projects, it often turns into a headache and the end result is not ideal. We get a lot of calls to fix ceilings that were a failed DIY attempt at ceiling texture removal.
As professional ceiling experts, our only responsibility is to work on your ceilings. We’re not distracted by taking dogs for walks, mowing the lawn, renewing the insurance, soccer games, etc., etc. We also have the tools necessary to get the job done. We have a special machine that takes off the texture and then we resurface the ceilings using a method that has been used for centuries by master artisans.
Popcorn ceiling removal at a condo at 71 Jameson Crt, New Westminster – Bedroom
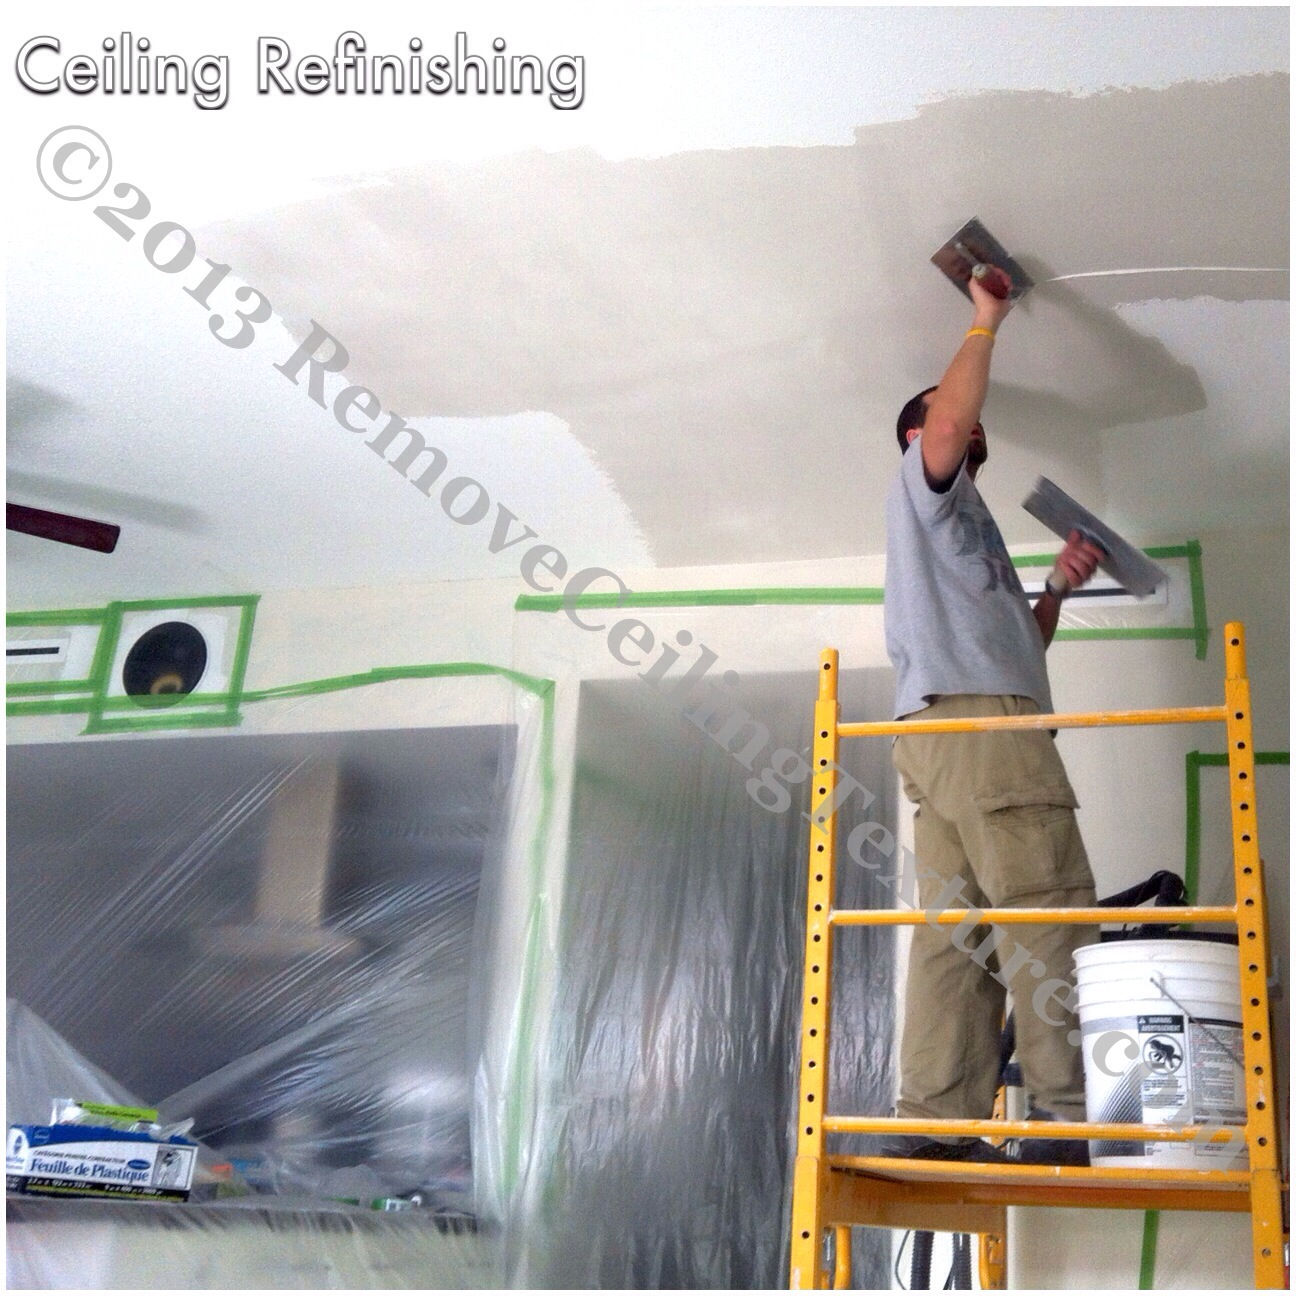
The hawk and trowel. This method takes years of experience to master. Our experience and specialization in ceiling texture removal is what makes us unique. What may take you weeks to finish, we can accomplish in several days. Our end result is professionally finished, smooth ceilings. Your time is valuable so why waste it with a trial and error attempt at removing popcorn texture?
To get a free quote for removing popcorn ceilings, give us a call at 604-420-7578 or contact us by email. Also, take a look at some of our other before and after photos to see how ceiling texture removal can transform a room.
Find out more about popcorn ceiling removal done the professional way. Contact us today for a FREE quote!
There are several things known to make most people cringe. Looking through old photos from the 80s when hair height was a competitive sport.
Seeing the person in front of you at the cashier open up her little change purse. “96 cents? I think I have that in pennies somewhere in here. One, two, oh, woopsie, that one’s not a penny, it’s a lint-covered alka seltzer.” I’m pretty sure this is the reason the penny is now outlawed in Canada.
People also cringe when they see textured ceilings when viewing a home to purchase. We get calls all the time from people who have viewed a home but the textured ceilings are turning them off. They want to know if it can be removed before they’ll even think about putting in an offer. Or they’ve already bought the house but they reduced their offer because they knew they would need to have the texture removed. Removing popcorn ceilings is often first on a new homeowner’s list of renovations.
Before and after of a dining room in Coquitlam after removing popcorn ceilingsEntrance before and after in Coquitlam after removing popcorn ceilings
Removing Popcorn Ceilings the Smart Way: Get it Right the First Time
We recently encountered a similar situation in Langley.
Removing popcorn ceilings: Fireplace before and after in Langley
The homeowners had purchased the house a few months earlier and were now starting renovations. First up was removing popcorn ceilings. They called a few people to come out to give them quotes. These were drywallers and jack-of-all-trades handymen. They also called us at RemoveCeilingTexture.com. We were the last to have a look. The first thing we asked was what year the home was built (it was from the 70s) and if the ceiling texture had been tested for asbestos. They told us no, the texture had not been tested and that the other contractors didn’t mention, or even seem to know about the possibility of asbestos in the ceiling. Asbestos is seen in some ceiling texture even into the early 1980s, yet the contractors were willing to just scrape it off because they didn’t know about the danger. If the texture had asbestos, they would be putting the health of the homeowners and their new baby at risk. Not to mention risking their workers’ health. The first thing we suggested was an asbestos test. We can still provide smooth ceilings if there is asbestos, however, it turned out that their texture did not have asbestos, so we would not need to take extra precautions.
Removing popcorn ceilings: Before and after of ceiling texture removal after a wall was removed
There are several problems with hiring people who are not ceiling experts. At best, you could end up with a sub-par ceiling. At worst, however, your health could be compromised. Removing popcorn ceilings, and other types of ceiling texture, is something we do every day. Another problem is that they may quote you a low price, sometimes even sight-unseen. After the work is done, the real price often becomes apparent. Extra charges are sometimes added to the bill. At RemoveCeilingTexture.com, we’ll come out to have a look, at no cost to you, to make sure we know exactly what the job will entail. That way, when we give you a quote, that’s the amount you’ll pay, with no hidden fees or extra charges.
The homeowners in Langley made the right choice and hired us to give them smooth ceilings. They were very happy with the results. If you’re wondering about removing popcorn ceilings, or other types of ceiling texture, give us a call today at 604-420-7578 or contact us by email to find out how you can get smooth ceilings. We don’t charge to come out and have a look, and our quotes are always obligation free.
Removing popcorn ceilings: Dining room before and after in LangleyRemoving Popcorn Ceilings: Bedroom before and after in Langley
Thinking about removing popcorn ceilings? Contact us today for a FREE quote!
Most fads of the 60s and 70s have pretty much disappeared. Except pet rocks. Like parrots and other long-living animals, pet rocks often outlived their owners, ending up abandoned in animal shelters.
This condo at 55 Blackberry Drive in New Westminster has had ceiling refinishing
Anyway, for some unexplainable reason, popcorn ceilings, sometimes known as stippled ceilings, are also still hanging in there. What you may not know is that you can do something about it! Ceiling refinishing is an option that will leave you with smooth ceilings.
Can’t I Just Scrape Off My Ceiling Texture?
Getting smooth ceilings isn’t as simple as scraping off the texture. There are other things to consider, outlined below, and this is why a professional who has a lot of ceiling experience should be hired. At RemoveCeilingTexture.com, our entire business is built around ceiling refinishing. We have the expertise necessary to turn your outdated, textured ceilings into smooth, flawless surfaces.
Asbestos:
If your home was built prior to the early 80s, the ceiling texture could contain asbestos. Asbestos fibres are generally not dangerous unless they are airborne, which they will become if you scrape the texture. These fibres are microscopic and when breathed in can get lodged in your lungs. This can lead to breathing problems, scarring and in extreme cases, mesothelioma. If you do have asbestos in your texture, you can still have smooth ceilings. RemoveCeilingTexture.com’s unique process can give you smooth ceilings without disturbing the asbestos fibres. The fibres are sealed in and won’t be disturbed unless there’s some sort of home demolition, or a major earthquake, in which case, ceiling texture would be the least of your problems.
Painted Ceiling Texture:
People often don’t know what to do with dirty ceiling texture. It can’t be cleaned, so they just slap some paint over it. This method is not an ideal solution. Who wants to repaint their ceilings every 6 months? If the texture has been painted, it won’t scrape off easily, if at all. It’ll be very difficult to remove it without gouging the ceiling. This is another great reason to have the professionals at RemoveCeilingTexture.com deal with your ceilings.
Uneven Ceilings:
The reason stipple is applied to ceilings is so that they don’t have to be finished properly. This saves the builder time and money. If you do manage to remove the texture from your ceilings, you will likely find that they’re in rough shape. They may be uneven or wavy. Wavy ceilings are seen especially in condos with concrete ceilings. The concrete frames they use are not perfect, so you’re left with waves, ridges, holes and other blemishes. This is where ceiling refinishing comes in.
What is Ceiling Refinishing and What is Remove Ceiling Texture’s Process?
If there is no asbestos in the ceiling texture, the texture is removed with a special sander/vacuum. This is not some Red Green inspired duct-taped contraption, but a refined piece of German engineering created specifically for the wall and ceiling industry.
*If there is asbestos in the ceiling, we skip the sanding step and add an encapsulant to the mud compound for the skim coating step below.
The first step to smooth ceilings is sanding the texture with the Festool specialty sanderThe Festool sander is German-engineered for the wall and ceiling industry
Next comes the crucial step that will make your ceilings look professional: ceiling refinishing. A mud compound is applied by hawk and trowel, the same method used by plaster artisans for centuries. Depending on the condition of the ceiling, one to three coats are applied in this fashion, with time for drying between each coat.
Ceiling refinishing using the same method used by plaster artisansDuring the ceiling refinishing process a mud compound is applied
The last step is sanding. Our method of applying the compound is so precise that the ceilings don’t really need much sanding at all. Just a light sanding and the finished product is revealed: a smooth, flawless surface.
Ceiling refinishing and repair in VancouverRefinished ceilings with potlights in Vancouver
A North Vancouver homeowner called Remove Ceiling Texture after a failed DIY attempt
So you thought getting smooth ceilings would be easy. You armed yourself with a scraper and the same single-minded determination that wives often witness when husbands refuse to follow the IKEA directions (seriously though, you need the Rosetta Stone to figure out those Swedish hieroglyphics). You thought, “I’m a handy guy (or gal), how hard could it be?” You got up on your ladder and you began the tedious process of scraping the popcorn texture. You soon regretted this decision. Either the texture didn’t come off nicely and you’ve damaged the drywall, or the texture did come off, but then you saw that the ceilings were uneven and looked terrible.
Failed DIY ceiling texture removal attempt in North Vancouver. RCT was called to fix the ceilings.
It’s shortly after this happens that we get a lot of calls from bashful homeowners. Our name may be Remove Ceiling Texture, but only because “Remove Ceiling Texture & Refinish Ceilings & Repair Ceiling Imperfections & Fix Homeowner’s Ceiling Mistakes” makes for a pretty long domain name.
Instead of trying to do it yourself, contact us from the start. We provide FREE, no obligation quotes for ceiling refinishing. Call us today at 604-420-7578 or contact us here or use the form below.
Do your ceilings need refinishing? Contact us today for a FREE, no obligation quote!
Some people may tell you that scraping texture from ceilings is easy. They may also have a bridge for sale. It’s probably best not to buy it, despite the fantastic price.
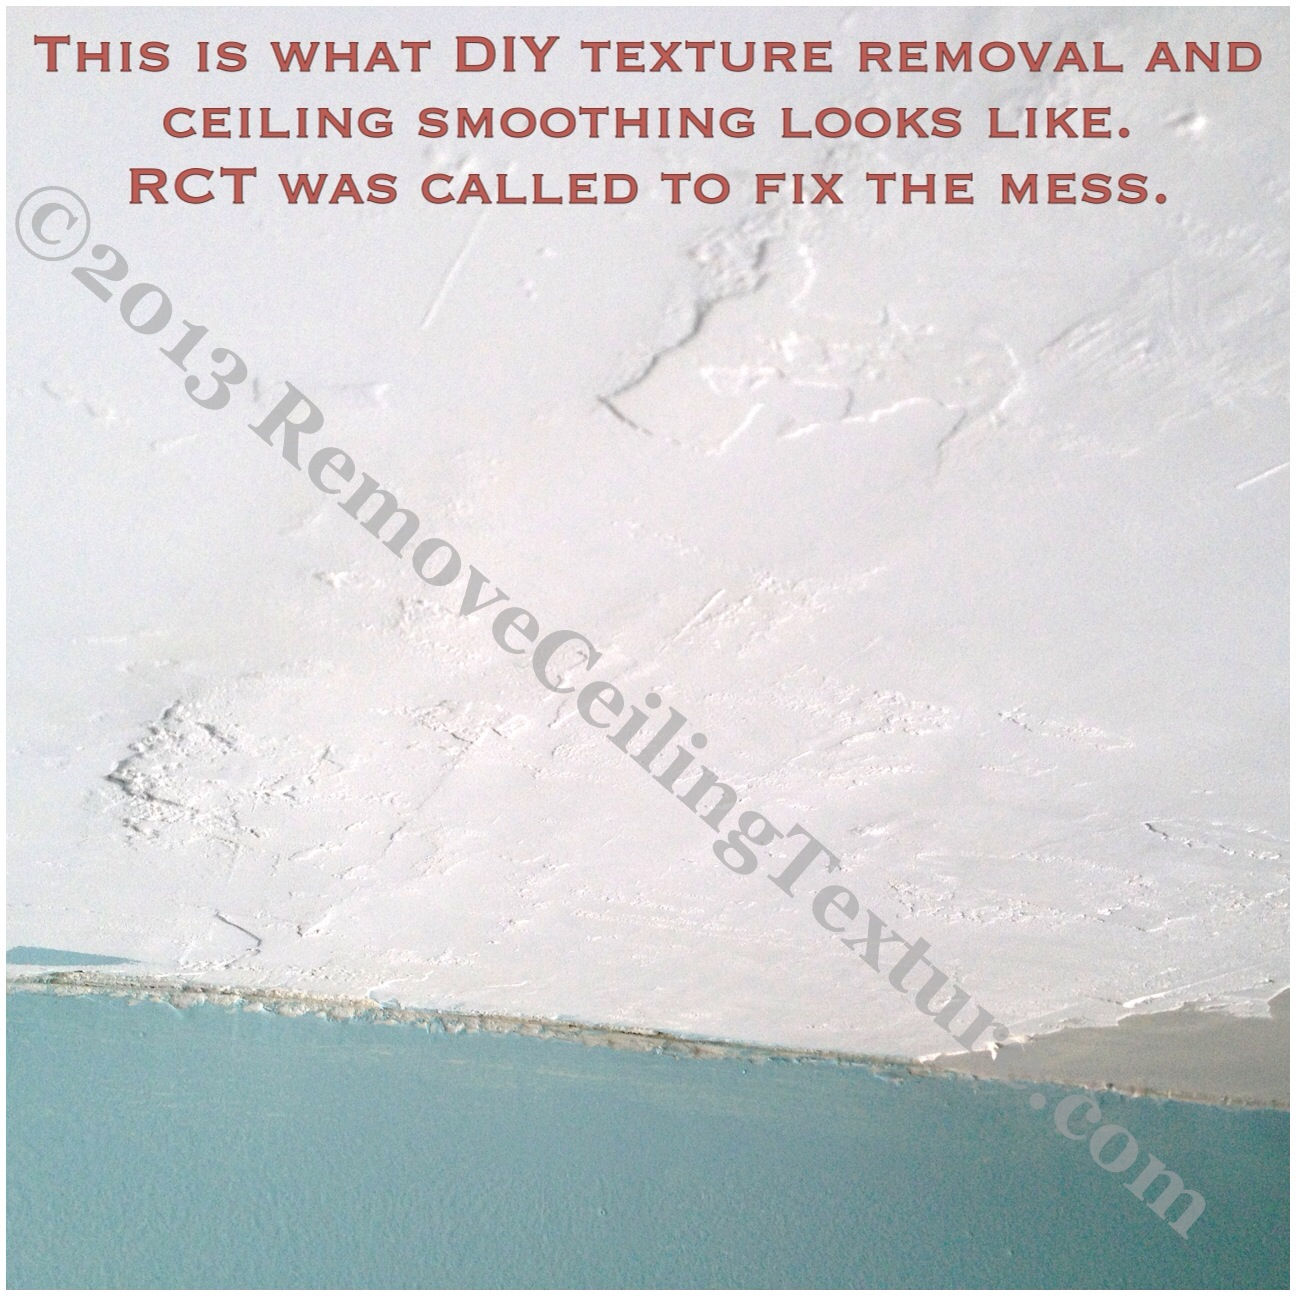
This is what DIY texture removal and ceiling smoothing looks like. RemoveCeilingTexture was called in to fix the mess.
In actuality, scraping texture from ceilings is messy and difficult work. Once the texture is gone, it still won’t be paint ready. Popcorn texture is applied so that builders don’t have to finish the ceilings properly. This saves them time and money. So once you’ve scraped your ceilings, you’ll see all the imperfections. This applies to both drywall and concrete ceilings. If your ceilings are concrete, you may have to deal with waves and ridges caused by the concrete forms. The ceiling will need to be professionally finished if you want it to look decent.
Asbestos–The Fire Resistant Gift That Keeps On Giving
You also have to consider the fact that houses and apartments built before 1980 could have asbestos in the ceiling texture. Asbestos was used in all sorts of building materials, including some ceiling textures, because it is fire resistant. At the time, they thought it was a miracle product. They later learned that microscopic, airborne asbestos fibres are extremely dangerous to breathe in. The fibres get lodged in your lungs and can cause scarring and mesothelioma, a type of cancer. You definitely don’t want to be scraping texture from ceilings if there’s a chance it could have asbestos fibres. At RemoveCeilingTexture.com, we test the texture to make sure there’s no asbestos if the building was built prior to 1985. This is for our safety as well as yours.
Scraping Texture From Ceilings: A Friendship Saved
The before photo is after the homeowner tried scraping texture from ceilings. In the end he ended up calling RemoveCeilingTexture.com to fix the mess.
We were recently contacted by a homeowner in downtown Vancouver who had figured that scraping his ceiling texture would be a piece of cake. His condo was built in the late 1980s, so asbestos was not a concern. He started in the living room with a friend’s help. What would take one professional no time at all ended up taking them a combined time of over 20 hours, and that was for the living/dining room only! And even with all that work, the ceiling looked horrible once the texture was gone. On top of that, he had a major mess on his hands, as the scraped texture ended up covering every surface in the apartment.
The floor was a complete mess after the homeowner tried scraping texture from ceilings. RemoveCeilingTexture.com’s process is not nearly this messy.
The homeowner soon realized that he was in over his head, quite literally. When you don’t have the tools and most importantly, the expertise, the project quickly turns into a nightmare. He decided there was no way he could ask his friend to continue this madness with him, if he valued his friendship. So he contacted us. We fixed the living and dining room ceilings that they had worked on and resurfaced the ceilings in the rest of the condo. We also repaired a section of ceiling where a wall had been removed. The ceiling transition between the two rooms is now seamless.
Wall removal left a large section of the ceiling to be repaired. We fixed this with no problem.After deciding that scraping texture from ceilings himself was too difficult, the homeowner called us in to do the rest of the condo.
At RemoveCeilingTexture.com, our area of focus is quite specific: We take ceilings from lumpy and dated to smooth and modern. We have the tools and the expertise and so we were able to rescue his DIY attempt, save his sanity and quite possibly save a friendship.
World peace is next on our list.
The laundry room gets updated thanks to popcorn ceiling texture removal.
And Now You Know…The Rest of the Story
The truth is, scraping texture from ceilings is only the first step in the process of getting smooth ceilings. Once the texture has been removed, we apply layers of compound, by hawk and trowel, to ensure the finished ceiling is level and free of any blemishes. This takes an expert eye and years of experience. Since your ceilings will need to be professionally finished even if you scrape them yourself, why not save yourself the headache and mess and have a professional work on them from the start? Call us today at 604-420-7578 for a FREEQUOTE on ceiling texture removal, or contact us by email.
Did you try to scrape your ceilings yourself and now need them fixed? Contact us today for a FREE quote!
Losing Inches is Only Good If You’re Talking Weight Loss
Instead of drywalling over textured ceilings, why not have the ceiling texture removed?
It’s a misconception that the only way to achieve modern, smooth ceilings is by drywalling over textured ceilings. Remove Ceiling Texture has been creating sleek ceilings for years and we have never put new drywall on top of existing texture. There are several problems with drywalling over textured ceilings. Firstly, you’ll lose headroom. Losing half an inch may not seem like much, but it can make a big difference in the feel of the room, especially if it’s in a basement. Secondly, once the drywall is up, it will still need to be finished professionally if you don’t want to see drywall seams or screws. And thirdly, you’ll have to pay for drywall! Our exclusive process of smoothing ceilings means that you won’t lose headroom, your ceilings will be as smooth as glass and you won’t have to pay for new drywall.
Smooth Ceilings – a North Vancouver Home’s Crown
We were called by homeowners in North Vancouver who were considering drywalling over textured ceilings. They decided to call us first for professional advice.
Instead of drywalling over textured ceilings, the homeowners opted for ceiling texture removal.
We discussed some of the issues that would come up by adding drywall–less headroom and the cost of drywall. Another issue for them was the beautiful crown moulding throughout the house. If new drywall was applied, the moulding would need to be removed first and then be re-installed. This would add to both the cost and timeline of the project. Our process of smoothing can be done with the crown moulding in place, and without the added layer of drywall. In addition, it’s a near dust-free method ensuring that their lives are not completely disrupted. They decided to trust us with their ceilings. As you can see from the before and after photos, the results are professional and polished.
By choosing ceiling texture removal over just drywalling over textured ceilings, the homeowners didn’t need to pay for the drywall expense.As a bonus, when we make your ceilings smooth, we don’t need to tear down any crown moulding. This saves both time and expense.Drywalling over textured ceilings would have resulted in loss of headroom. The homeowners wisely choose ceiling texture removal instead.If the owners had chosen drywalling over textured ceilings, this bulkhead would have been difficult to deal with. Instead, we were able to easily smooth over it.
When it Comes to Ceilings, Professionals Count (well, more accurately, they “smooth”)
If a contractor suggests drywalling over textured ceilings, it probably means that he (or she) just doesn’t know what else to do with it. They think that removing the texture is a messy, time-consuming process that they don’t particularly want to deal with. And you know what? If you don’t know what you’re doing, removing ceiling texture is messy and time-consuming. However, at Remove Ceiling Texture our entire area of focus is…ceilings. We have the tools, we have the knowledge and we have the expertise that other contractors just don’t have when it comes to smoothing ceilings. As a bonus, our process is not nearly as messy as some contractors tend to be.
Our ceiling texture removal process produces almost no mess. Quite a difference from most contractors out there.
Here are some During and After shots of our work:
While we were smoothing the ceilings, the chandelier didn’t even need to come down!First coat being applied. Ceiling texture removal makes the room look much more modern.Preparing the crown moulding. Moulding doesn’t need to be torn down for us to smooth the ceilings.Still looks pretty rough after only one coat, but the After photo shows how smooth the final results are.
Do you want smooth ceilings? Contact us today for a FREE quote!
There is a big Do It Yourself movement right now. If you turn on HGTV, you likely won’t have to wait long for a DIY program. The book section at Home Depot is filled with DIY guides. The idea is that you’ll save money by doing a project yourself. The problem with this theory is that it doesn’t consider your time to be worth anything. Whether you’re working to earn income, socializing with friends or spending quality time with family, your time is valuable.
At RemoveCeilingTexture we’re often contacted by homeowners who have attempted to scrape off their popcorn ceiling texture. This is a messy, time-consuming process, but the real problem comes after the texture has been removed. There’s a reason texture is applied to ceilings. It’s to hide imperfections. Once the texture is removed, these deficiencies are obvious. The ceilings will still need to be finished by a professional.
This is what DIY texture removal and ceiling smoothing looks like. Remove Ceiling Texture was called in to fix the mess.Smoothing ceilings is harder than it looks! This was a DIY attempt.
This is after Remove Ceiling Texture was called in to professionally fix the DIY mess.Remove Ceiling Texture was able to fix the homeowner’s DIY disaster.
Hiring a professional contractor offers several advantages over attempting a project yourself.
Practice Makes Perfect
Could someone off the street walk into your place of work and do your job? Not likely. Perhaps you have a degree or have taken relevant courses. You’ve had training and experience. You are a professional at what you do. In the same way, professional contractors have had training and they have experience. This is what they do every single day. They have know-how that can’t be taught in a 30-minute DIY show.
Time is Money
What might take you several days or a week to get done, a professional contractor can accomplish in a day or so. There are a couple of reasons for this. First of all, the contractor doesn’t have to consult books or internet articles to make sure that he’s doing it the right way. As mentioned above, they have the knowledge and experience already. And second of all, this is their full time job. You have other things that need to get done. Maybe you work full time and can’t commit to the hours at a time that are often needed. You might have to drive kids to soccer games or piano lessons. When you’re constantly interrupted, it’s difficult to get much done at all. Just ask any mom with small kids!
Tools of the Trade
Many projects require specific tools. Unless your neighbour is Mike Holmes and he loves to lend you his tools, you’ll either have to rent or buy the tools necessary. And there’s a learning curve to many of these tools—it takes a few tries to get it right. A skilled professional knows the tools of his (or her!) trade like the back of his hand.
Quality Craftsmanship–Guaranteed Perfection
The other problem with the saving money theory, is that often the project doesn’t get done the right way the first time. You could end up spending more time and money having to redo the work you’ve already done. A professional contractor does it right the first time. They also guarantee their work. If something does go wrong or doesn’t look quite right, they’ll come back and fix it. Their reputation is on the line, so perfection is important. A project that has been done DIY-style is often apparent to most people. Even if it was done fairly well, it usually doesn’t have the polished look that it will when done by a professional.
So how should you go about hiring a professional contractor?
Finding a Qualified Contractor
Ask around. Friends, family or neighbours can be a good source of referrals. Not only can they tell you about the contractor’s performance, but you can see the work for yourself. Home building associations can also be useful. An internet search of the project you want done (for example: ceiling texture removal) should pull up a list of relevant contractors also.
Discuss your project with a few potential contractors to get their advice and suggestions on how they would do the work. At the first meeting, some may give you a rough estimate of costs, depending on the project’s scope and complexity. The first meeting is usually more to get to know the contractor and the contractor’s work. Unless you have been able to check out the contractor ahead of time you should not sign anything or pay anything at this stage.-1
If possible, have the contractors visit the project site before giving you a quote. For accuracy, it’s important that they see the entire scope of work and take their own measurements where necessary. While they are there, ask as many questions as possible. As the CMHC guide points out:
You won’t offend reputable firms with questions. If a contractor doesn’t seem to know much about the technical details of the job or doesn’t want to talk about them, you may have the wrong contractor.-2
It’s also important to ask about workers’ compensation and insurance coverage. Every reputable contractor should have these basics. Feel free to ask for samples of work and references. If they are experienced professionals, they should have no problem providing you with this.
You Get What You Pay For
A few quotes should be enough to make a decision. They should be in writing and state clearly what is included. There should also be an expected time frame. If the quotes are vastly different from each other, make sure each contractor understood the project completely. If something was missed on one quote, you won’t be able to compare them properly. While price is important, it shouldn’t be the only thing you consider. Think about your interaction with each contractor. Did you feel comfortable asking questions or were you made to feel stupid? Did they communicate well with you or did you have to drag answers out of them? Did they offer suggestions or were they not very familiar with the type of project? If you aren’t comfortable with your contractor, the cheapest price isn’t necessarily worth it in the long run.
The Nitty Gritty
Once you’ve hired the contractor, the open communication should continue. The best way to avoid misunderstandings is to talk. If you have questions or concerns, don’t be afraid to voice them. Likewise, if something unexpected comes up that could change the scope of the project (as sometimes does with renovations and construction), your contractor should discuss it with you as soon as possible and give you options on how to solve the issue. You should always feel involved in the process and never forced into any decision—after all, it’s your house and your money.
Upon Completion
When the project is complete, inspect the work to make sure that you’re happy with it. If there is a problem, contact your contractor right away. They will be glad to fix it. Remember, contractors often work on referrals, so your satisfaction is important to them.
Some people love puttering around the house, working on a project bit by bit for weeks on end. If this is you and you can live with less than perfect results, by all means, go the DIY route. But if you demand quality results and want things done properly the first time, hire a qualified professional—you won’t regret it.
This DIY ceiling texture removal job left the ceilings uneven, patchy and full of ridges.The homeowner made a mess of smoothing his ceilings as he attempted to DIY.
Remove Ceiling Texture cleaned up the DIY mess and the homeowners were left with perfectly smooth ceilings.The DIY ceiling smoothing attempt was professionally fixed by Remove Ceiling Texture.
Did you attempt to DIY with your ceilings? Contact us today!